Before you begin the Idealpos Online setup process, ensure that you are running the latest build of Idealpos 9.
To check the version of Idealpos that you're running, open Idealpos. If the POS screen opens, close it.
Go to Help > Idealpos Support.
A window will open and the version and build number will be displayed on the bottom left corner of the window.
If the version displayed is Idealpos v7, update Idealpos to the latest build of Idealpos v7.1 or Idealpos 9 by running the latest Idealpos Framework, then run the latest build of Idealpos.
When you're installing the latest version of Idealpos, make sure that you install the new version on all your POS terminals.
If you need assistance with updating Idealpos, please contact Support or your Reseller.
Once you have updated all your terminals and confirmed they have been updated (go to Help > Idealpos Support to check the version/build), you may continue the below setup process.
In order to setup Idealpos Online, you need to register your email address to access the service.
To do this, you will need to retrieve the Username and Access Code from Idealpos 9.
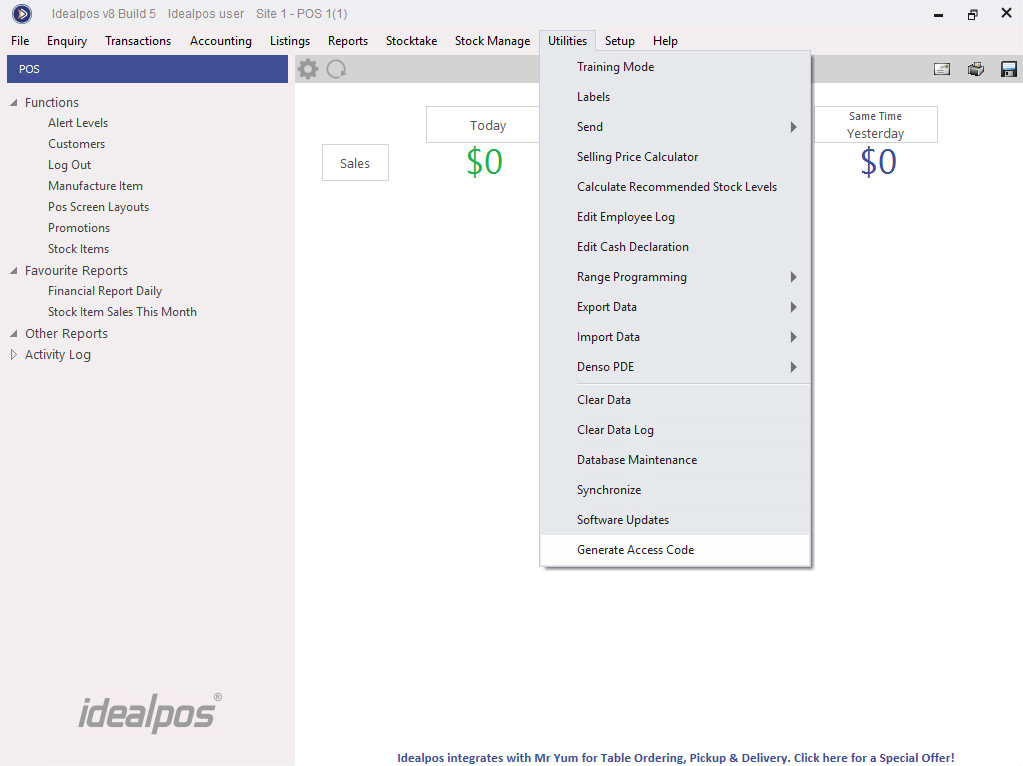
Go to Utilities > Generate Access Code
The Generate Access Code menu option will only appear if you are logged in as Admin and have used the Admin Password.
If you're not already logged in as Admin, go to File > Log Out, then enter admin as the User Name and enter your admin Password, then press the 'Log In' button.
The Access Code will expire 24 hours after it is generated.
Note to Idealpos Resellers!
Please do not setup Idealpos Online accounts for your customers.
Email orders@idealpos.co and from there, Idealpos will create the Idealpos Online Subscription and configuration for eCommerce.
The Username and Access Code will appear in a screen as follows:

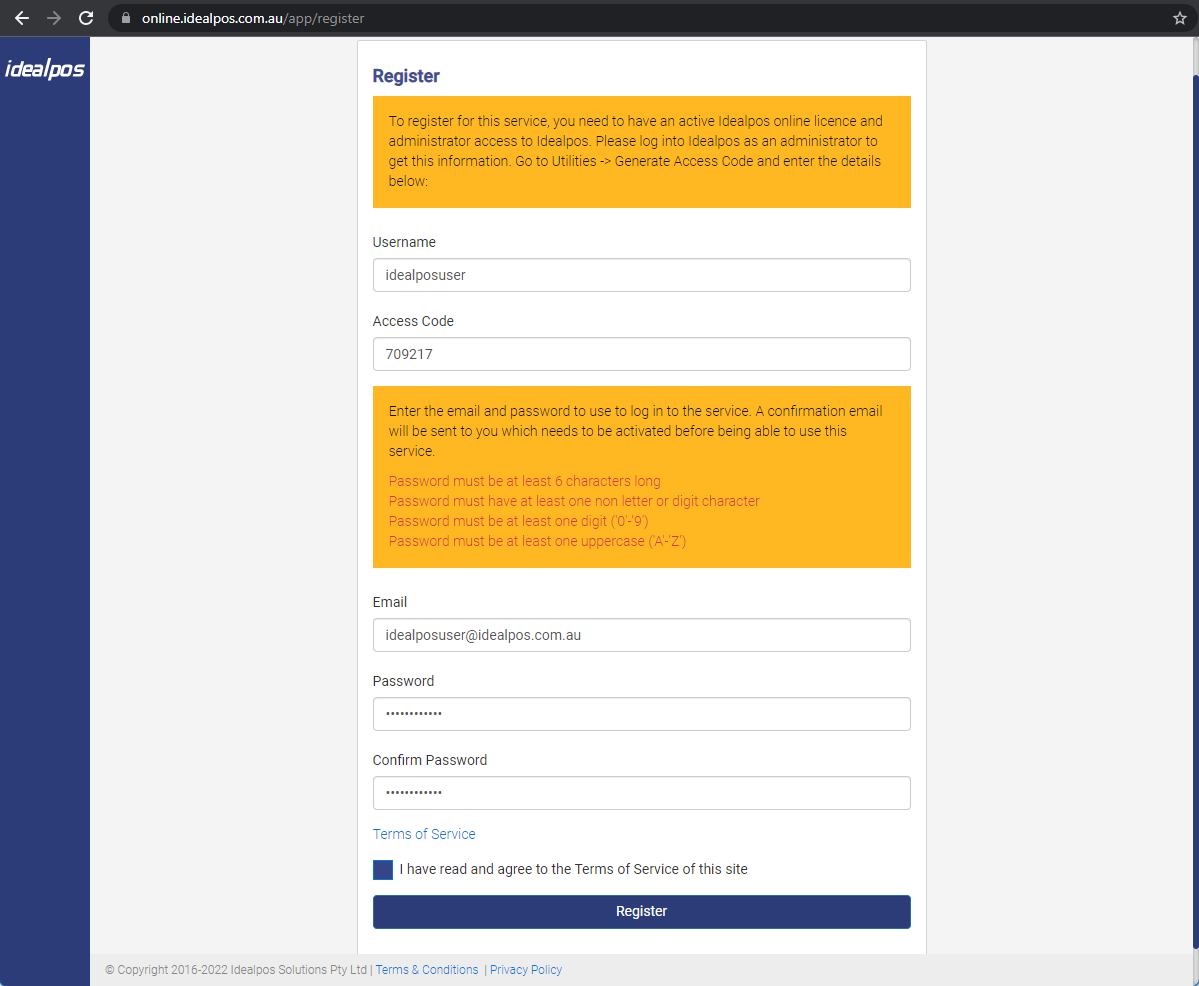
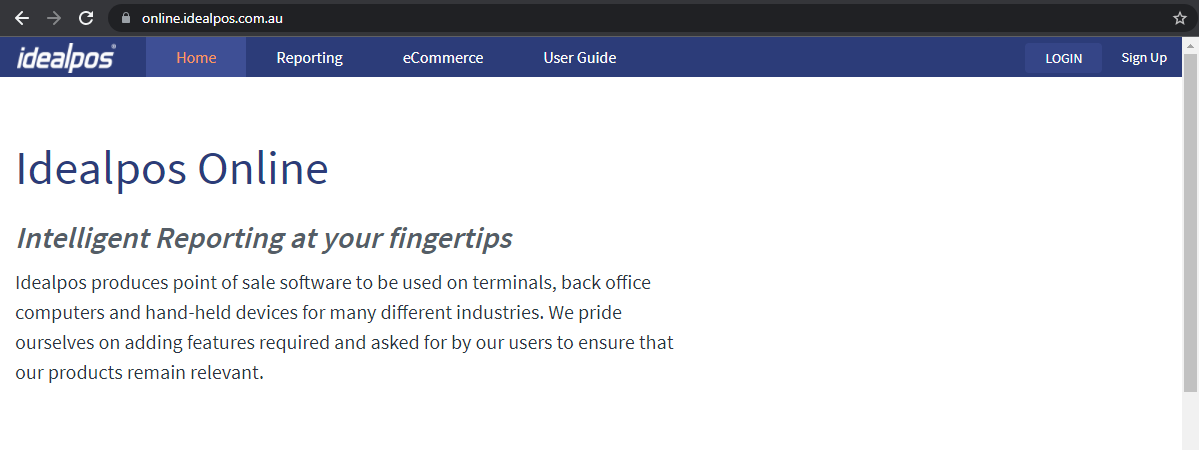
Once you have the Username and Access Code, go to https://online.idealpos.com.au and click on Sign Up.
Enter the Username and Access Code into the Register screen, followed by your email address and a password of your choice.
Note that the email address you enter will be used to login to your account and receive emails from Idealpos Online.
The password will need to have at least 8 characters; one Upper Case, Lower Case, Number and Character.
After you press the 'Register' button, you will see this message.
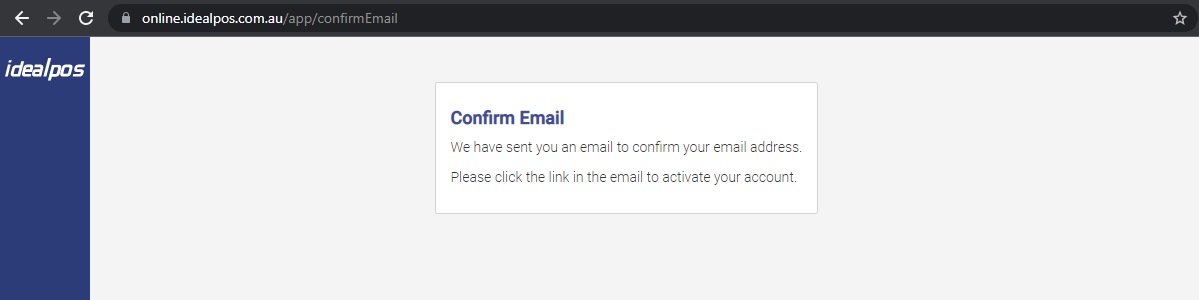
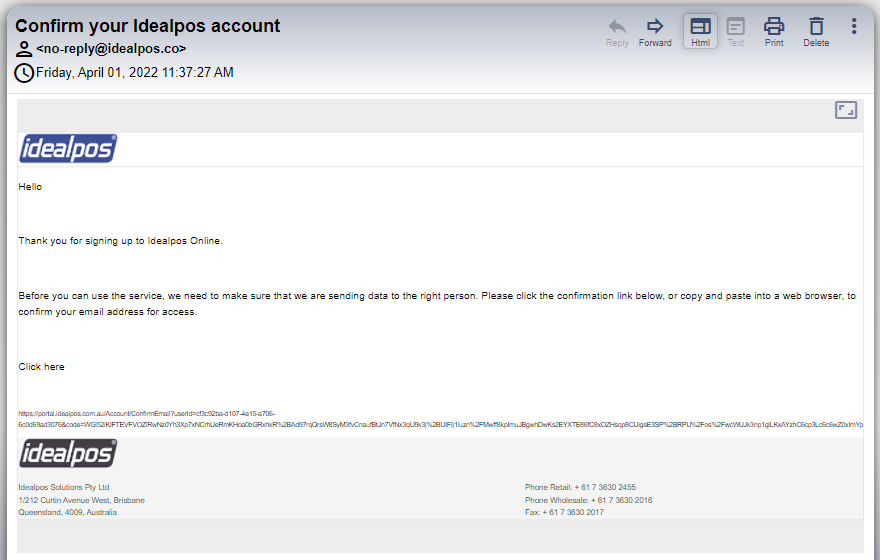
Check your email; An email from no-reply@idealpos.co will be sent to the registered email address.
Click on the link named 'Click here' to activate the account login.
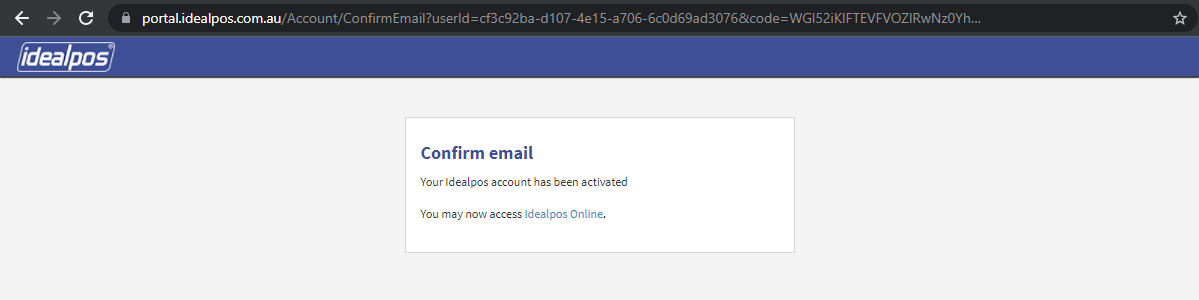
After clicking on the link, the following web page will open confirming that your account has been activated.
You can then click on the link which will go to https://online.idealpos.com.au
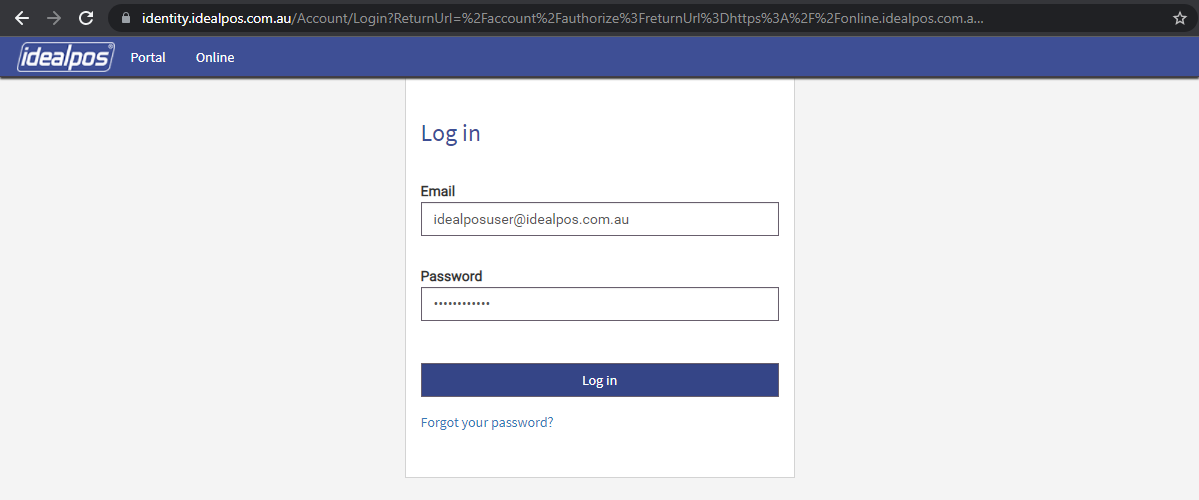
Click on the Login button at the top right corner of the page to login.
Enter the registered email address and the password then press the 'Log in' button.
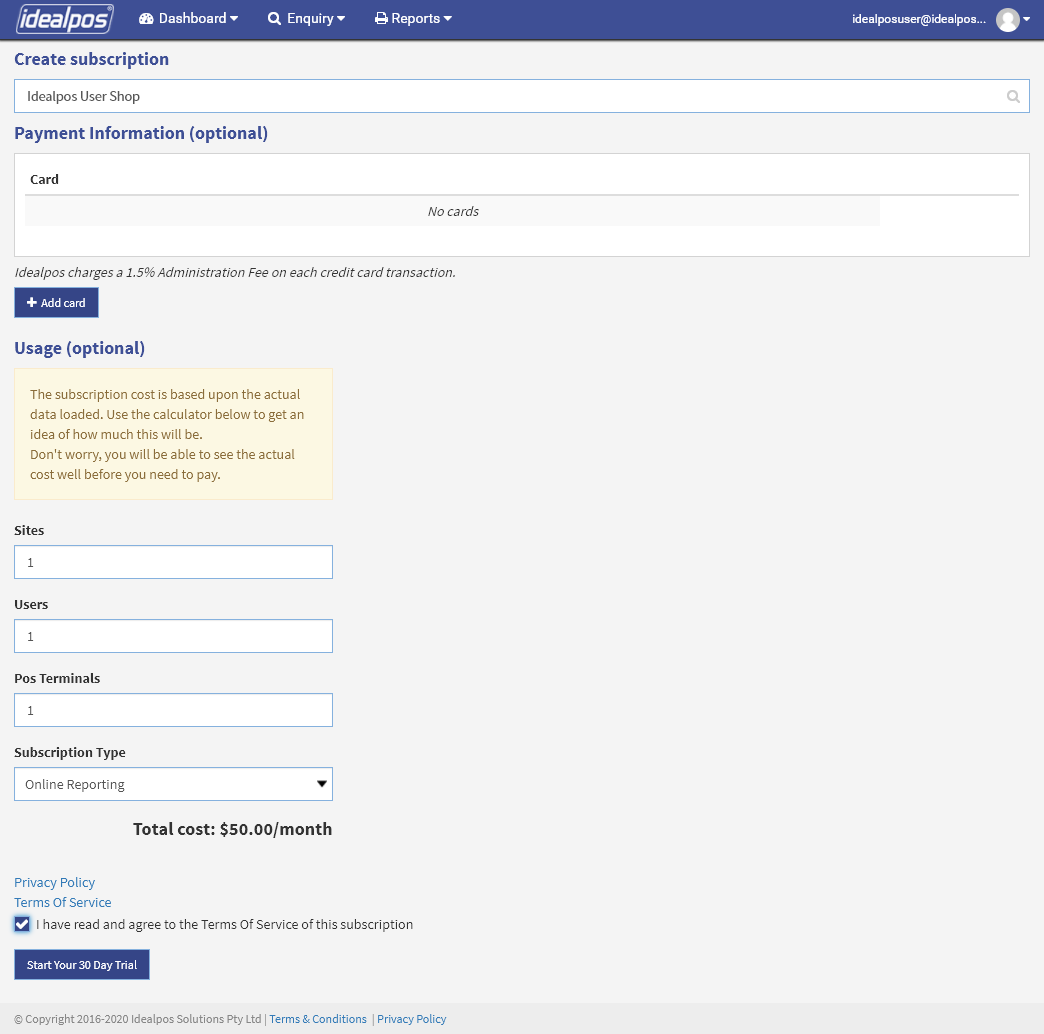
When logging in for the first time, you will see the Create Subscription screen.
All Customers who sign up for Idealpos Online will receive a free 30 day trial.
Credit Card details are not required to access the free trial.
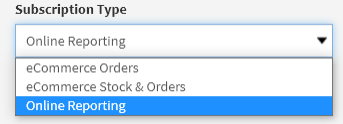
Depending on your requirements, you will need to select from one of three Subscription Types:
Note that the ability to modify the Subscription Type is available after the subscription has been created. The Subscription Type can be changed by clicking on your User Avatar icon on the top-right corner of the window, select "Settings", then select "Subscriptions". From the Subscriptions tab, select your Subscription then press "Update Plan".
Once you have selected the required Subscription Type then read and accepted the Service Agreement, click on 'Start Your 30 Day Trial'.
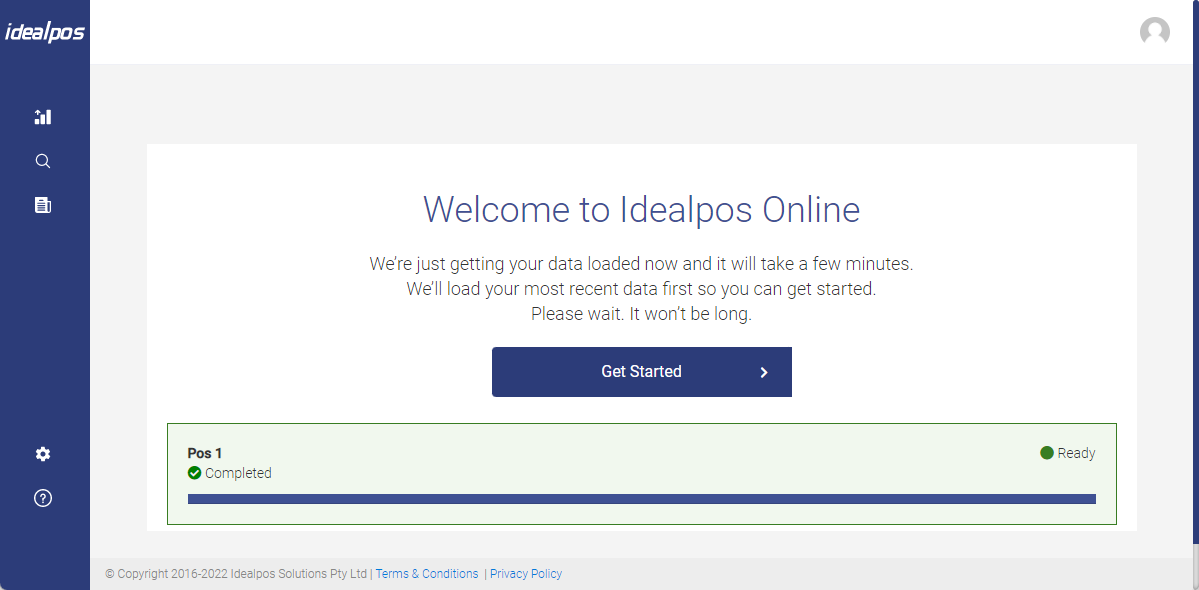
After starting your 30 day trial, you will see the Welcome Screen.
During this stage, Idealpos Online is establishing a connection to the POS terminals within the Licence Gateway.
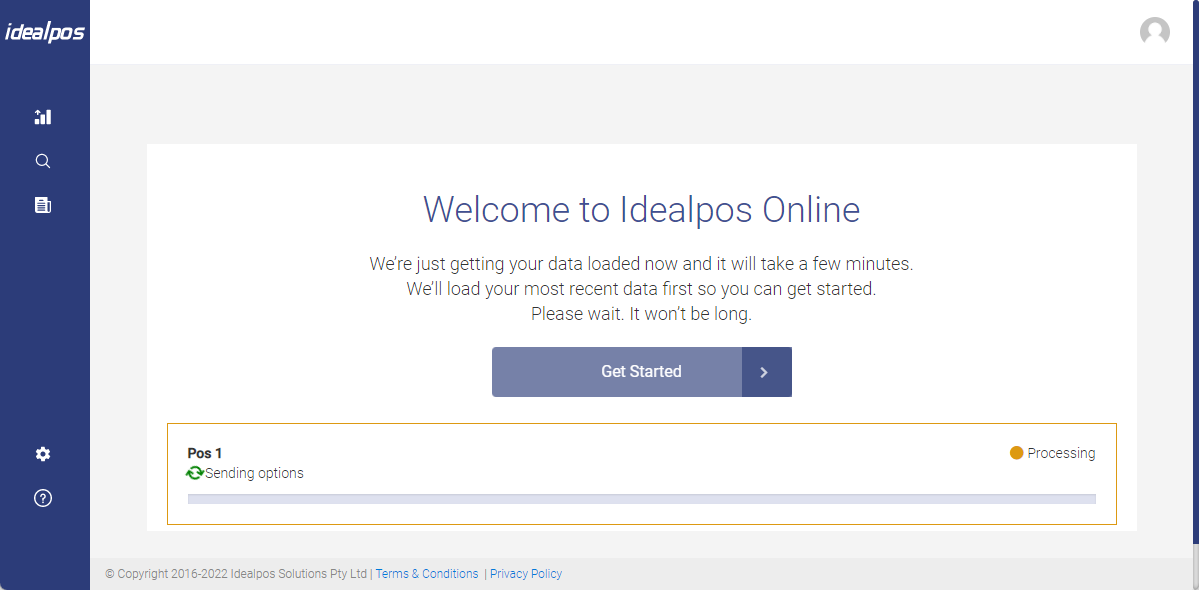
The Initial Synchronisation will then occur.
During this time, the initial sync will copy static data such as Stock Items, Departments, Customers, Suppliers, etc.
Once the static data has been synchronised, the transactional data starting from the most recent dates will be collected.
You may then press the 'Get Started' button to proceed to the Idealpos Online dashboard.